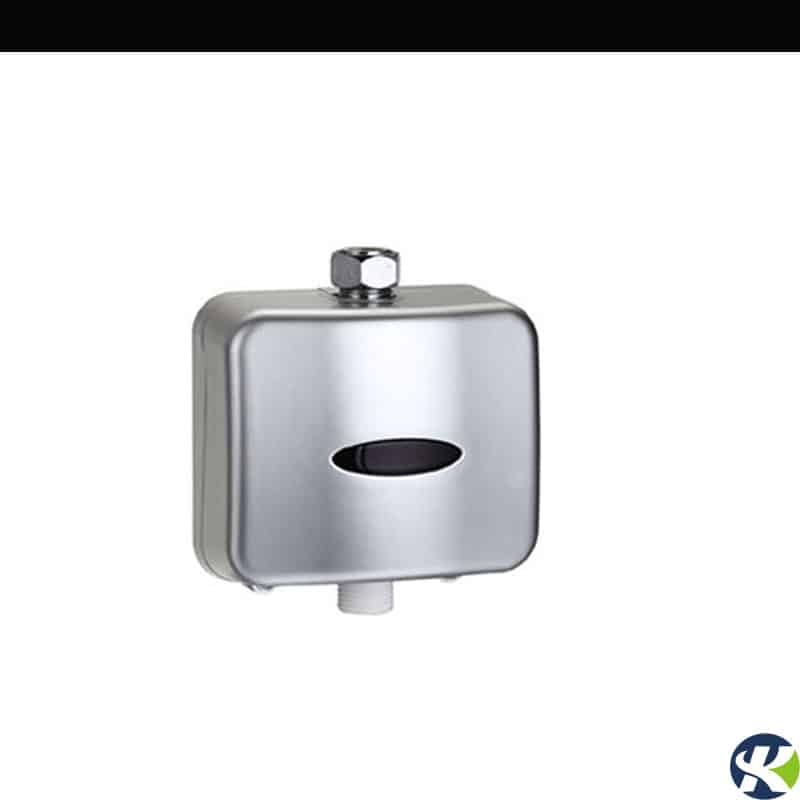
Disclosed automatic urinal flusher with the whole flush valve disclosed outside. The item 1081D with a square stainless steel control box is smart and convenient for installation. When you stand in front of the auto flush valve, the sensor detects and active 2s pre-flush; And 6s Flush automatically after leaving.
- Brand: KEGE
- Item No: KEG-1081D
- 2s for pre-flush & 6s for after-flush
- Automatically flush if no usage in 24 hours
- Hygienic, bacteria and germs free without touching
- Disclosed stainless steel control box
Features:
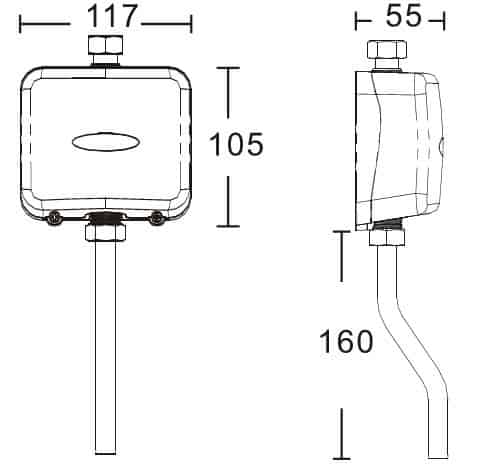
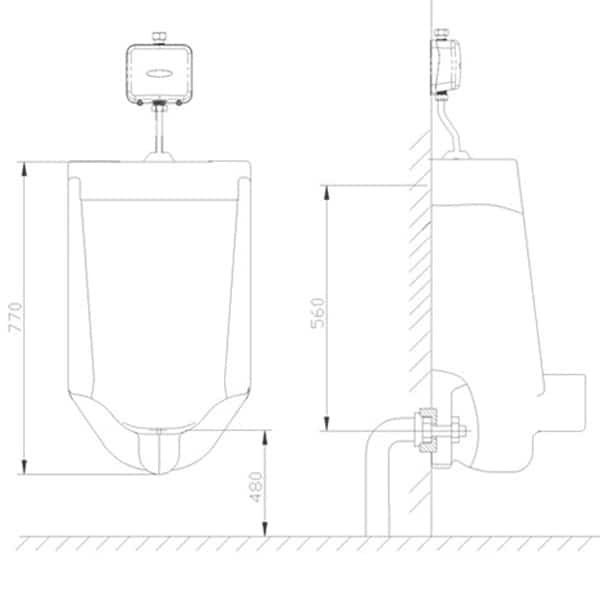
DISCLOSED AUTOMATIC URINAL FLUSHER KEG-1081D SPECIFICATION |
|||||||
| External Power Supply | Applicable water pressure | Applicable Water Temperature | Ambient Temperature | Feedwater caliber | Flushing water volume | ||
|
4XAA 6V batteries |
AC:110v-240V,50Hz-60Hz | DC&AC combined | 0.05-0.7Mpa | 0.1-60℃ | 0.1-45℃ | G1/2” | 1.5-4L(10s based on water pressure of 0.3-0.6Mpa) |
How to install automatic urinal flush?
STEP1
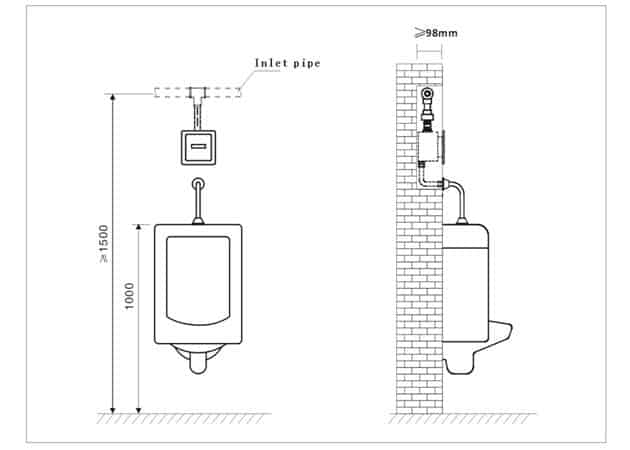
Dig a suitable hole on the wall according to the installation instruction. Inter control box into the wall and connect the inlet pipe and outlet pipe. Open the stop-valve to ensure all the connectors are watertight.
Notice:
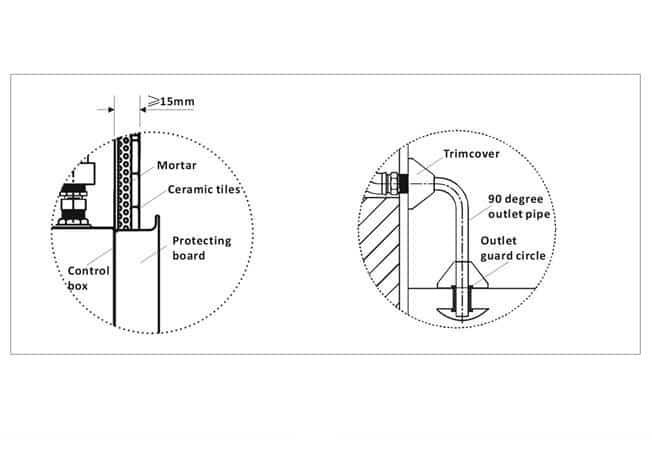
The distance between the housing surface and the ceramic tiles should be longer than 15mm.
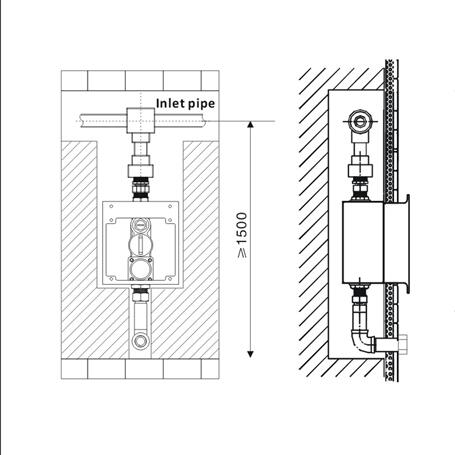
STEP2
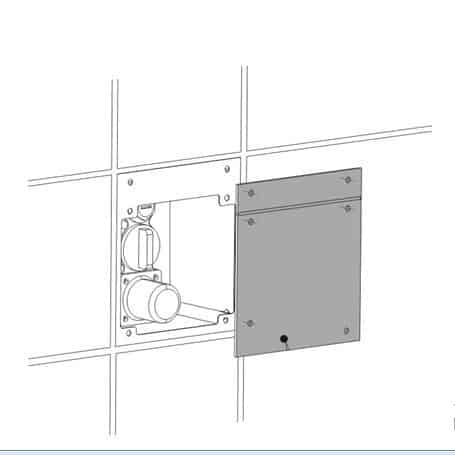
Adjust the position of the control box, fixed with pieces of wood or other fillers. Then cover the control box by protecting the board to avoid the solenoid valve be damaged when filling the cement around the control box. Finally, laying the tiles.
Notice:
The protecting board should be taken down when finished.
STEP3
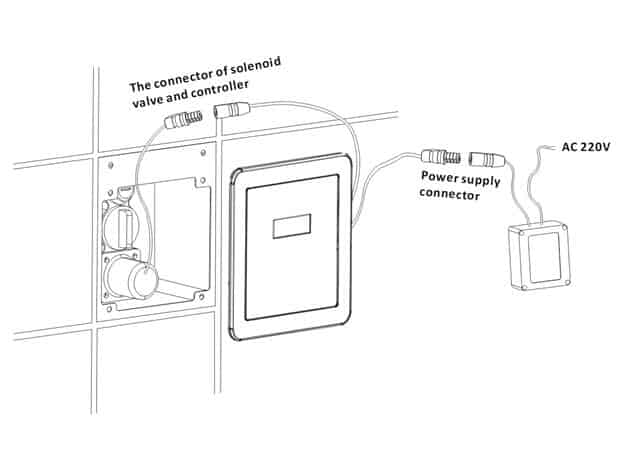
1. A wire connected to the 220V power source should be laid before placing the control box into the wall.
2. Connect the connectors as shown right, place the power supply box as figure 1 shows.
3. Connect the power supply box to the power source.
4. Fix the auto urinal flush face plate on the control box.
Notice:
Please shut off the power source during the installation.


Touchless Urinal Flusher Valve Troubleshooting |
||
| Problem | Possible Reason | Suggested Solution |
| No water flow | Batteries run out | Replace batteries |
| Dirt on sensor surface | Clean the sensor surface | |
| Main water supply is shut off | Turn main water supply on | |
| Dirt on water filter net | Clean the water filter net | |
| Water pressure is not applicable | Refer to technical specification | |
| Have a continuous water flow problem | Batteries run out | Replace batteries |
| Low water pressure | Refer to technical specification | |

